Valentines Sugar Cookies
Lovely cookies, just right for Valentines Day, and super easy, even if it takes a bit of time.
Ingredients
Sugar Cookies
- 2 1/4 Cup All Purpose Flour Level Cups
- 1/2 tsp Baking Powder
- 1/4 tsp Salt
- 3/4 Cup Unsalted Butter Room Temperature
- 3/4 Cup Granulated Sugar
- 1 Egg Room Temperature
- 2 tsp Vanilla Extract
- 1/4 tsp Almond Extract Optional
Royal Icing
- 3 Tbsp Egg Whites
- 1/2 tsp Vanilla Extract
- 2 Cups Powdered Sugar
Instructions
Sugar Cookies
- Whisk the flour, baking powder, and salt together in a medium bowl. Set Aside.
- In a large bowl using a hand mixer or a stand mixer fitted with a paddle attachment, beat the butter and sugar together on high until completely smooth and creamy (about 2 minutes). Add the egg, vanilla, and almond extract (if using) and beat on high until combined (about 1 minute). Scrape down the sides and bottom of the bowl and beat again as needed to combine.
- Add the dry ingriedents to the wet ingredients and mix on low untill combined. Dough will be relitively soft. If the dough seems too soft and sticky for rolling, add 1 more tablespoon flour.
- Divide the dough into 2 equal parts. Place each portion onto a piece of lightly floured parchment paper or a lightly floured silicone baking mat. With a lightly floured rolling pin, roll the dough out to about a 1/4-inch thickness. Use more flour if the dough seems too sticky. The rolled out dough can be any shape as long as it is evenly 1/4-inch thick.
- Lightly dust one of the rolled out doughs with flour. Place a piece of parchment paper on top (this prevents sticking. Place the second rolled out dough on top. Cover with plastic wrap or aluminuium foil, then refridgerate for 1-2 hours or over night (or up to 2 days).
- Once chilled, preheat oven to 350F. Line 2-3 large baking sheets with parchment paper or silicone baking mats. Carefully remove the top dough piece from the fridge. If it's sticking to the bottm, run your hand under it to help remove it. Using a cookie cutter, cut the dough into shapes. Re-roll the remaining dough and continue cutting untill all the dough is used. Repeat with the second piece of dough.
- Arrange the cookies on a baking sheet about 3 inches apart. Bake for 11-12 minutes, or until lightly browned around the edges. If your oven has hot spots, rotate the baking sheet half way through bake time. Allow cookies to cool on the baking sheet for 5 minutes then transfer to a wire rack to cool completely before decorationg.
- Decorate the cooled cookies, feel free to tint the icing with gel food coloring. No need to cover the decorated cookies as you wait for the icing to set.
- Enjoy cookies right away or wait for icing to set. Plain or decorated cookies stay soft for about 5 days when covered tightly at room temperature. For longer storage, cover and refrigerate for up to 10 days. Plan or decorated cookies also freeze well for up to 4 months.
Royal Icing
- In large bowl or stand mixer combine the egg whites and vanilla and beat until frothy.
- Add powdered sugar gradually and mix on low speed until sugar is incorporated and mixture is shiny.
- Turn speed to high and beat until mixture forms stiff, glossy peaks. This should take about 5-7 minutes.
- Transfer icing to pastry bag and pipe onto cookies.
Notes
One thing to note, the dough is basically ready when it's kind of close to a Play-Doh consistency.
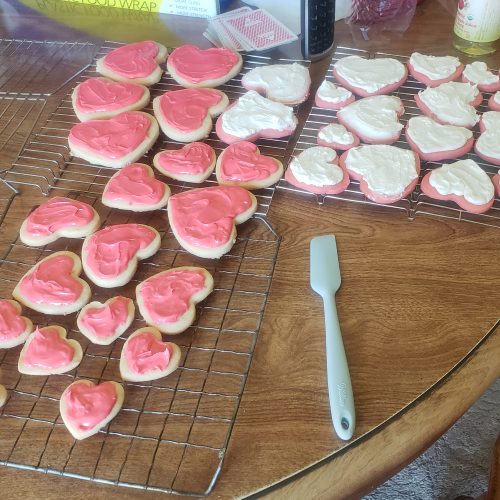
After splitting the dough into two parts, I added some red food coloring to one half and kneaded till mixed. After making the royal icing I iced the red cookies, then returned the icing back to the mixing bowl and added red food coloring before icing the white cookies for a two toned effect on both cookies.
This worked out very well and didn't change the consistency of the dough or the icing in any way. Something to note, it is important to follow the instructions on the royal icing very closely. I didn't, and mixed it a bit wrong before I realized my mistake, and I feel this made it turn out thicker than it should have, and made it a bit difficult to pipe on correctly, so just be wary of this, but it worked out well for me, and I'm sure it will work out great for you!! Good luck, and happy frosting!!
Download QRPrint QR